How you can use TestGorilla assessments within the Lever ATS
You can connect TestGorilla to your Lever account, allowing you to invite candidates to an assessment and see the summarized results inside Lever. This article explains how that works. The Lever integration is available on the Plus plan and can be enabled by users with Admin or Owner access. Within Lever, you must have a Super Admin role to set up the integration.
| Please check with Lever regarding the plan and access level needed on their side to make this work. |
Approx. reading time 3 minutes
In this article
All images in this article are for illustrative purposes only. Some of them may not be a perfect match to your screen.
Set up the integration
The integration between Lever and TestGorilla is set up from within your TestGorilla account.
| Note: Only the owner of your TestGorilla account can set up the integration. They must have the role of Super Admin within Lever to complete the setup. |
Connect the integration
|
Caution: Before enabling the integration, visit Lever:
|
If you do not do this, the email invitation to your candidates will not be sent.
| Click your name in the top right corner of the browser and select the Integrations option from the drop-down menu. | |
|
Locate the Lever integration and click the Enable button. |
|
| Authorize the TestGorilla integration, after you are redirected to Lever. | |
| Click Accept to connect the integration. Once complete, you can configure your integration preferences in TestGorilla. |
| Tip: Now would be the ideal time to create an assessment in your TestGorilla account, and a job posting in your Lever account. |
Configure the integration
|
In TestGorilla, select the Lever stage where you'd like to send the TestGorilla invitation to the candidate. |
|
|
Associate TestGorilla assessments with job postings in Lever. By pairing them up, candidates that apply to the specified job post will get the appropriate TestGorilla assessment invitation. |
Use the integration
After you set up and configure the integration with Lever, you can proceed to invite your candidates and review their hiring stage and results within the Lever platform.
Inviting candidates
Applicants will automatically be invited to an assessment based on your configuration preferences in TestGorilla. In order to ensure that your candidate receives an email invitation to complete the appropriate assessment, follow the below steps:
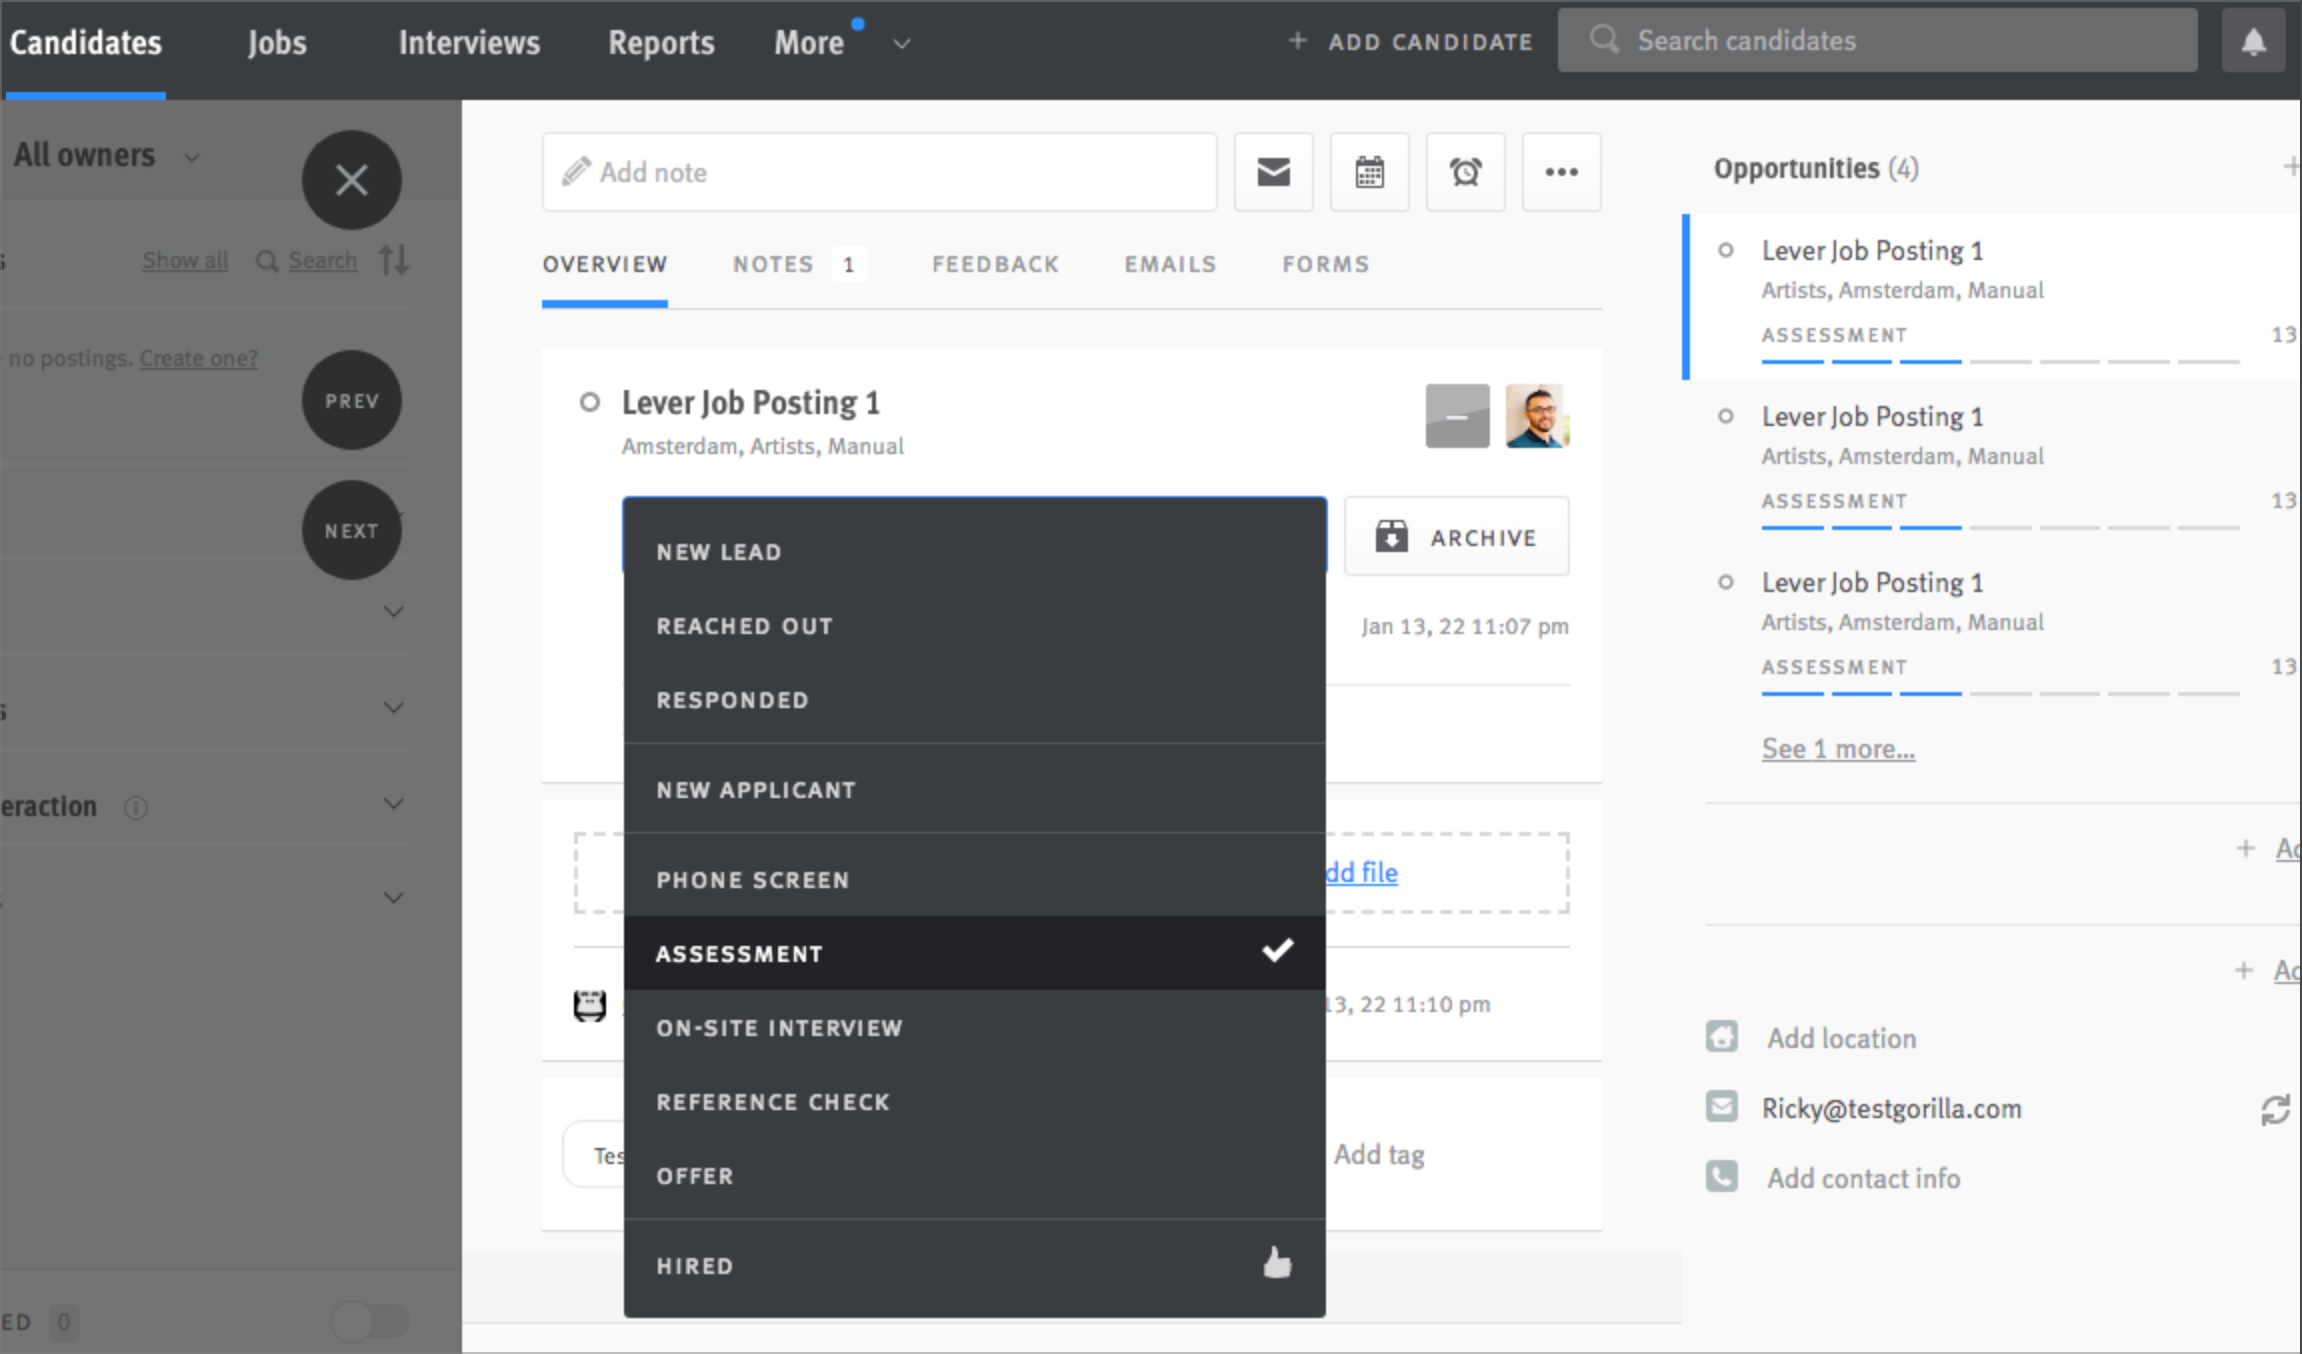
| Within Lever, navigate to the Candidates tab. | ||
| Choose the relevant candidate. | ||
| Select the correct Job Posting from the right side of the Overview dashboard. | ||
|
Move the candidate to the correct stage of the hiring process (as per your configuration settings). The candidate will automatically receive their assessment invitation via the Lever platform, meaning there is no need to invite your candidates from within TestGorilla.
|
Status update tags
To report on the candidate’s progress through the hiring journey, TestGorilla automatically assigns a status tag to each candidate:

| Status | Meaning |
| TestGorilla: Invitation Pending | an invitation from TestGorilla will be sent |
| TestGorilla: Invitation Sent | an invitation from TestGorilla has been sent |
| TestGorilla: Invitation Failed | TestGorilla failed to send the assessment invitation. The most common reason for this is that the candidate does not have an email address registered in Lever. |
| TestGorilla: Assessment Started | The candidate has successfully begun the assessment |
| TestGorilla: Assessment Completed | The candidate has successfully completed the assessment |
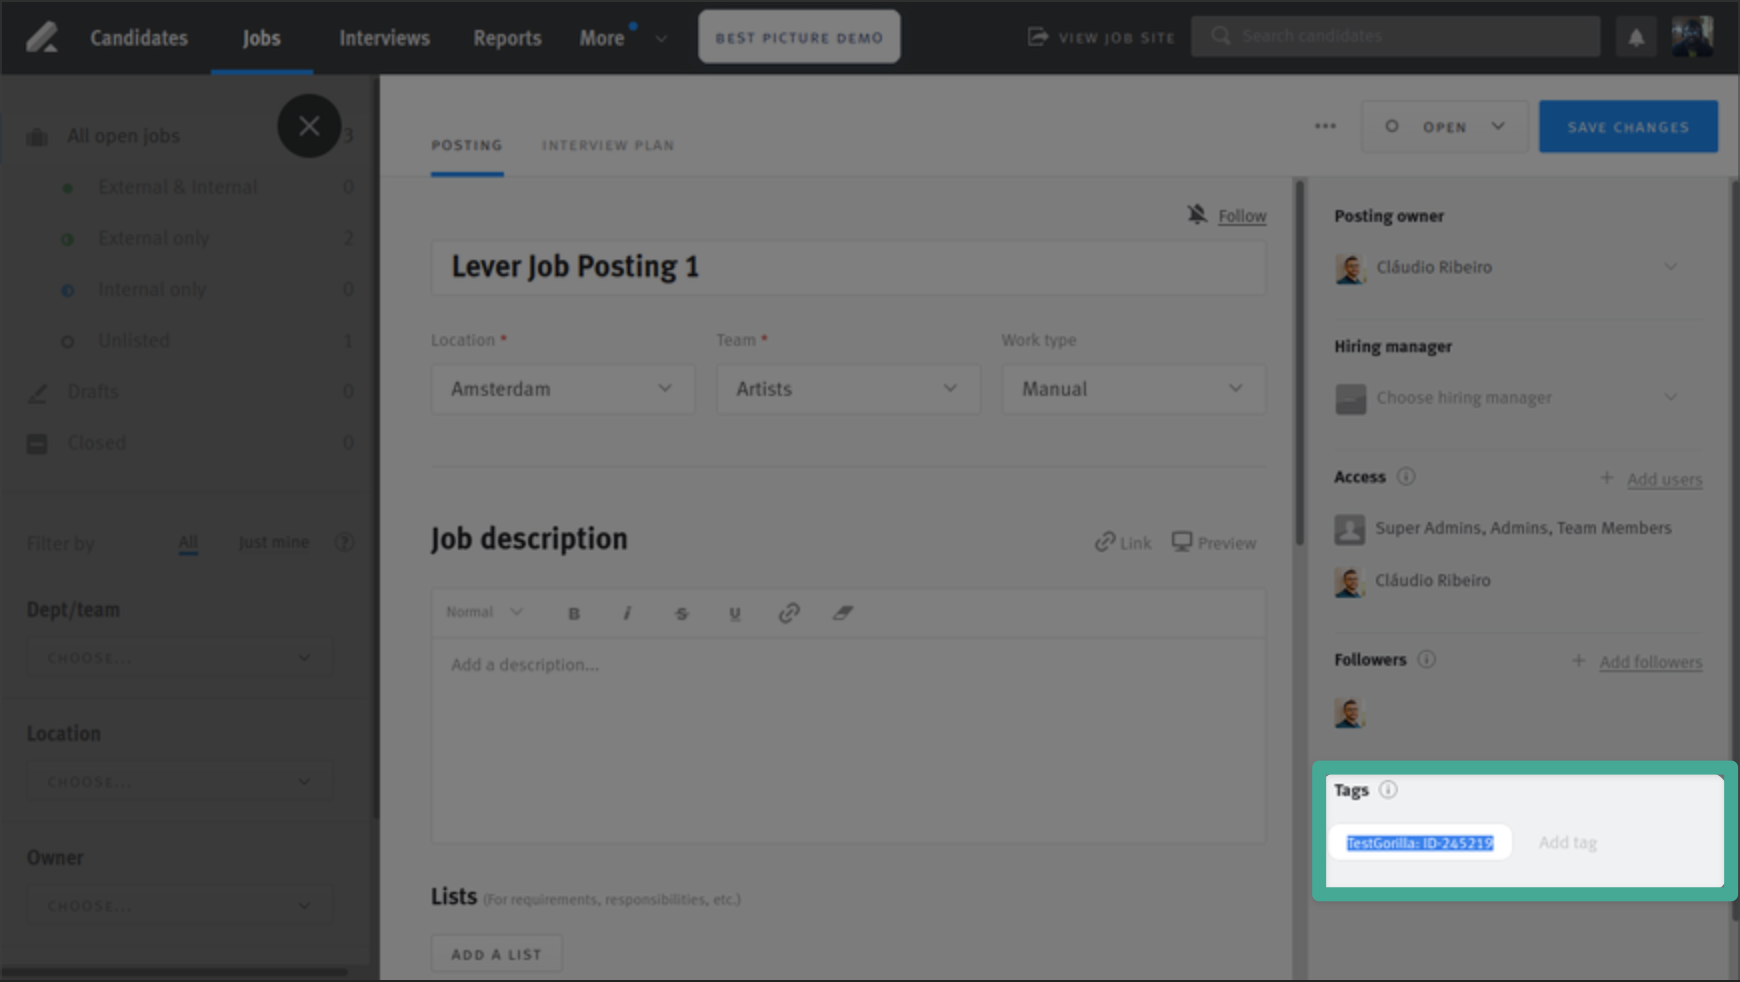
Job posting tags
To ensure the right assessment invitation is sent to the candidate, TestGorilla adds an Assessment ID tag to each job posting, based on your configuration in TestGorilla.
This will be something like TestGorilla: ID-245219 . The tag specifies which assessment the candidate was invited to.
Review responses
The candidate results will be posted as a Note on the opportunity. This note includes:
- Their average test score
- The test-level scores
- Anti-cheating monitor flags
- A link to their candidate page in TestGorilla
Disable the integration
| In TestGorilla, navigate to the Integrations page located in the dropdown under your account name in the top right of the home page. | |
Click Disable. 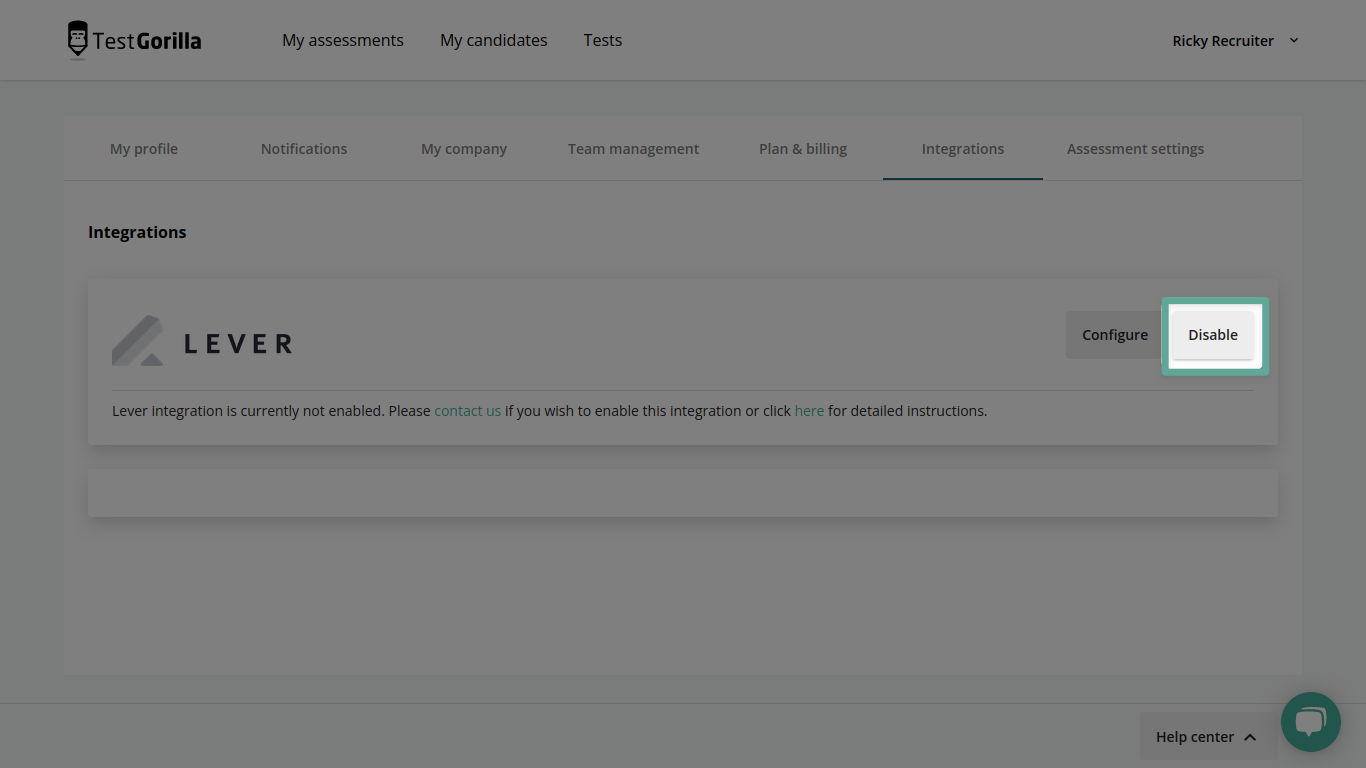
|
|
| Go to your Lever account. | |
| Navigate to the Integrations & API Settings page. | |
| In the Authorized Apps tab, locate TestGorilla. | |
| Click Revoke Access to disable the integration. |
Common questions
My candidates do not receive their invitation emails when I invite them through Lever. How do I fix this?
Most likely, the Candidate Stage change option was not turned on when setting up the integration. You'll want to be sure it's turned on. To do this::
- In Lever, go to Settings > Integrations and API > Webhooks
- Enable Candidate Stage Change option.
It’s also possible that some of the admin users (or owners) have changed the stage that triggers the invitations back on the TestGorilla app (Top right menu > Integrations > click on the Lever gear settings).
Please log in to your TestGorilla account and ensure the invitation stage matches the expected one. Also, please make sure the mapping between Assessment and Job posting is correct.